Hello, in other posts I have posted the LAMP installation guide on CentOS, but it has not Control Panel. Today, You can install Sentora easily, quickly with this post.
Compatible operating systems : CentOS 6, CentOS 7, Ubuntu 12.04, Ubuntu 14.04.
Technology used :
- Apache Web server – The most popular Web server.
- PHP – Yeah, you can not run WordPress or PHP scripts without it.
- ProFTP – FTP Server.
- MySQL / MariaDB – SQL database administration system.
- Postfix – Configure Email Server.
- phpMyAdmin – Database Management.
- DoveCot – Create IMAP Server.
Install Sentora on Centos 7
What do we need?
- OS: Centos 6, Centos 7, Ubuntu 14.04
Centos 6: Mysql 5.1, PHP 5.3, Apache 2.4.x
Centos 7: MariaDB 5.5.x, PHP 5.4, Apache 2.4.x
Ubuntu 14.04: Mysql 5.5.x, PHP 5.5.9, Apache 2.4.x
- Minimum RAM: 512MB (1G recommended)
- Disk: This is comfortable, preferably 8GB or better
- There is a domain name domain IP of VPS,
First, you update centos to update the latest by using the command: yum update
The next step is to remove the bind (if available) using the command: yum remove -y httpd bind
Next, I will officially install Sentora on: bash <(curl -L -ss http://sentora.org/install)
Note: You must use root to install offline, if you use other users like ubuntu, then add the command sudo -i first and then install (Amazon VPS usually not for root)
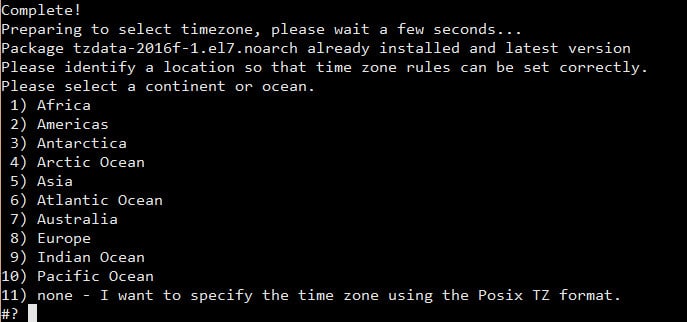
During the installation, there are several questions, just read carefully you will be answered
- Select Region: Example: I will the numbers 5, 49, 1. Choose 5 because I’m in Asia
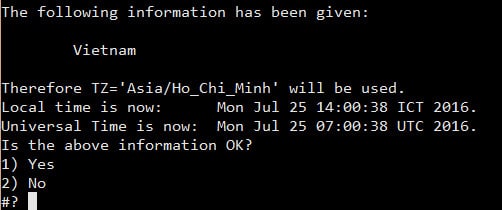
Next, choose 49: Vietnam

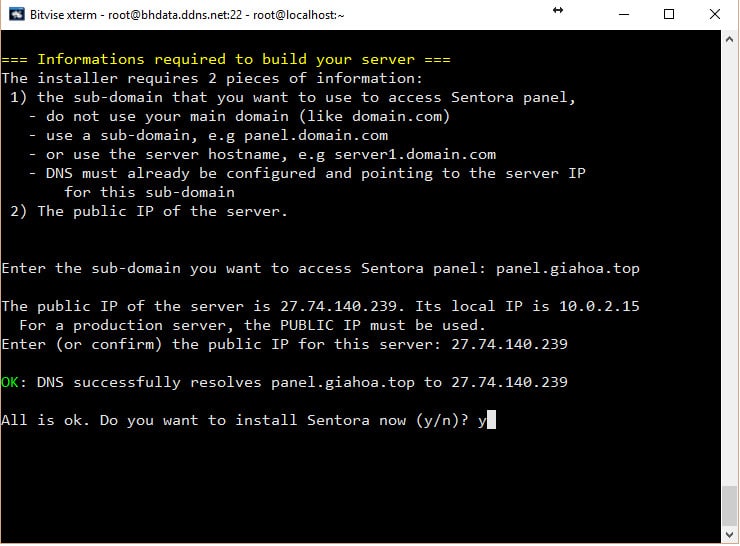
- Remember to Point your domain to VPS’s IP
Then check the IP of the VPS, usually right, just press Enter is okay
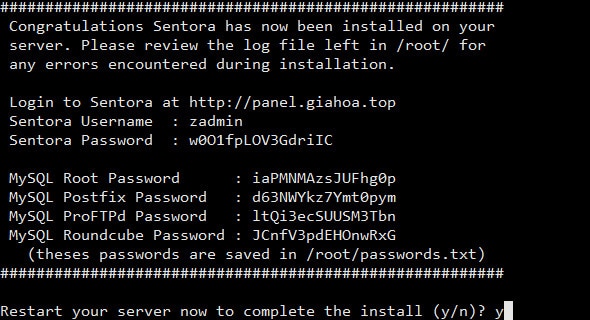
Your job is to wait for it to finish. Once installed, you will receive the login information as below, please copy to use later. Then press y then Enter to restart VPS and start using.
Note: If you forget, you can go to / root and open the password.txt file, it will be there.
The login link is the sub-domain that you set
The user is: zadmin
Password is the Sentora Password in the picture.
