1&1 is the big domain manager in the world. Today you will learn how to manage your domain here.
Specifically, after reading the article, you will know
- Turn off auto-extended
- Activate hidden domain information
- Unlock and transfer the domain
- Change Domain Nameserver
- Create a subdomain for the domain
- Cancellation service at 1 & 1
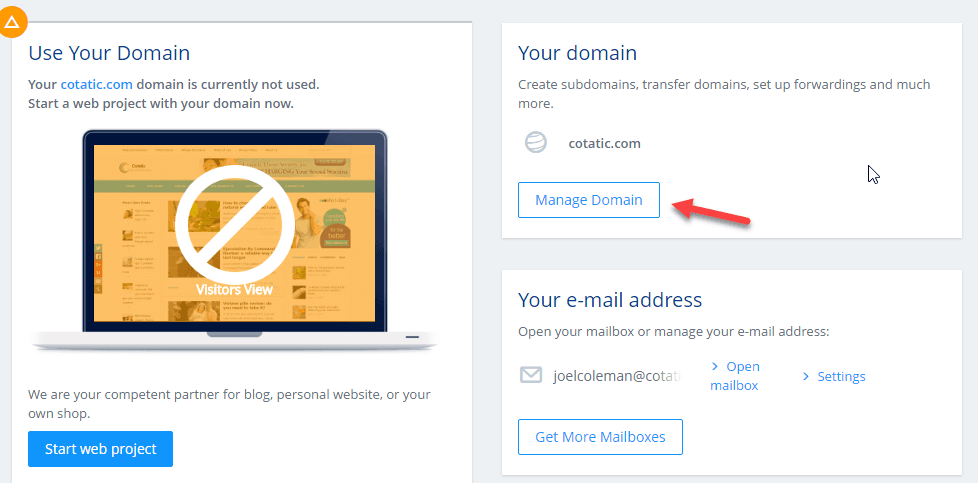
First, go to the homepage 1 & 1, sign in and click the Manage Domain button.
Next, you will see the list of registered domain names, followed by the domain name management function.
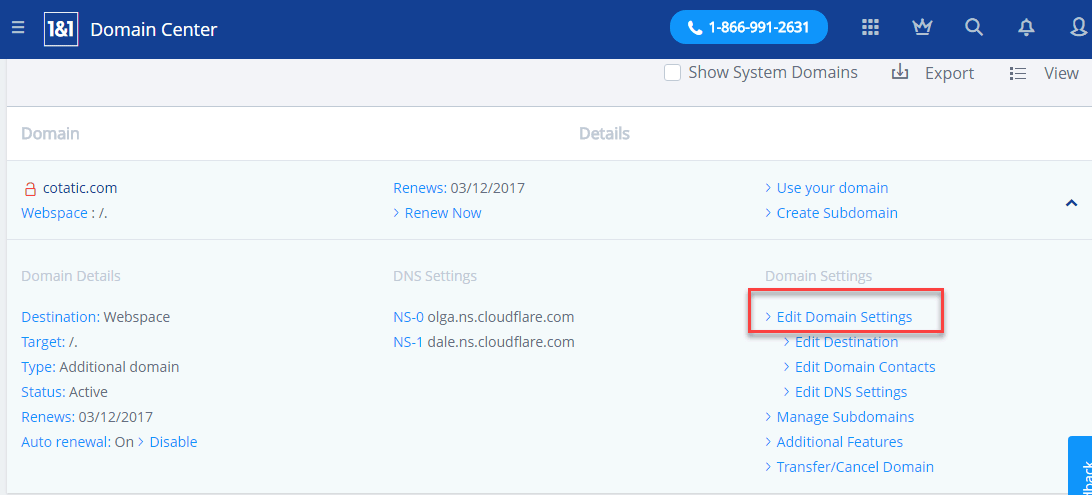
Click on Edit Domain Settings to go to the domain configuration screen. Domain Settings interface as shown below
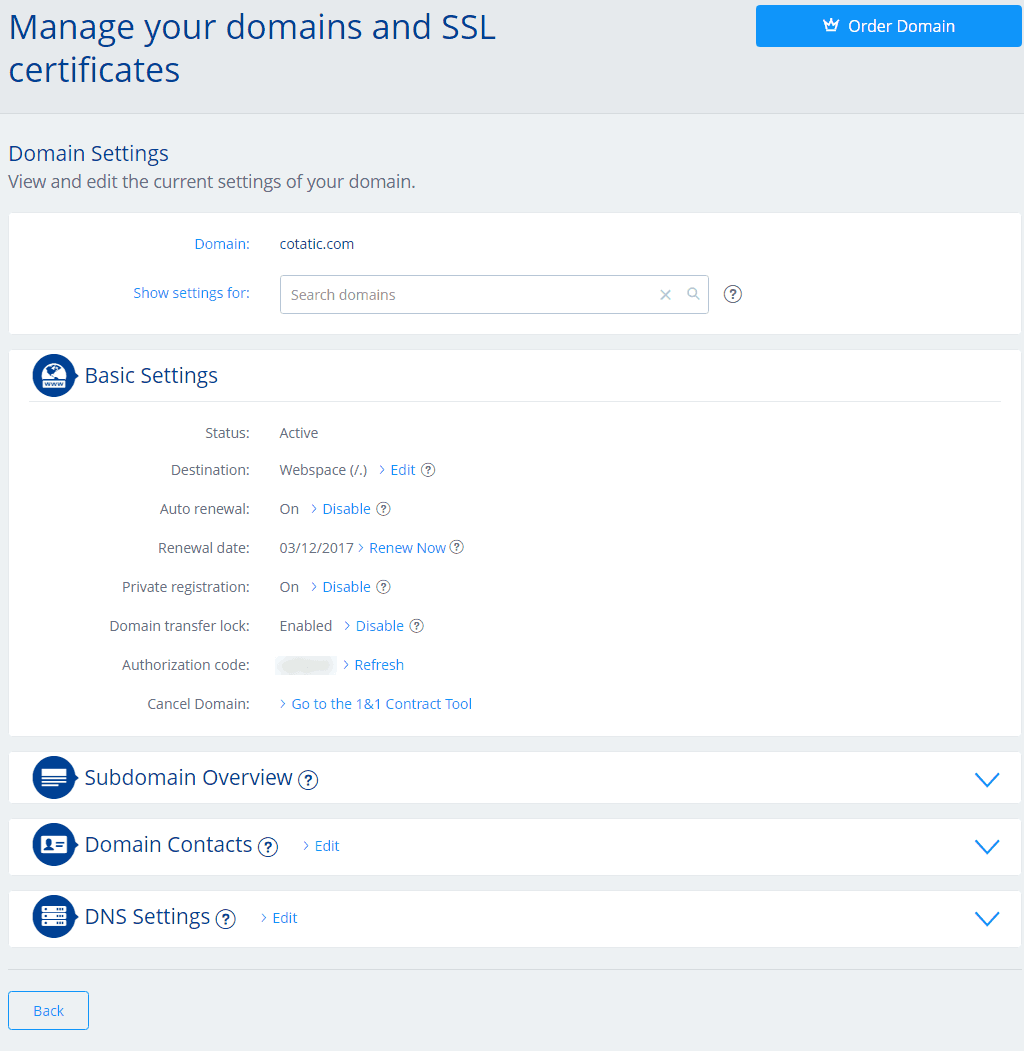
Now you can see some options in Basic Setting.
Turn off automatic renewal
When you register your domain at 1 & 1, the domain name will automatically renew every year. However, if you are not sure about sticking with the domain you just signed up for, you should disable this renewal feature. In addition, domain name fees at 1 & 1 fall into the $ 15 range. It is very likely that you will transfer the domain name when it expires.
To disable automatic renewal, click on Disable in the Auto-renewal line. At that time the Auto-renewal line will switch to Off.
Activate hidden domain information
All domain names registered at 1 & 1 will be free of charge. To use this feature, click Enable in the Private Registration line. The Private Registration will then move to On as shown above
Unlock and transfer the domain
In Basic Settings, you will see Authorization code for domain transfer. So you do not have to request this code as some other domain name providers.
If you want to transfer the domain, you need to unlock the domain by clicking Disable in the domain transfer lock line.
Note: You must wait 60 days after domain name registration to transfer the domain name.
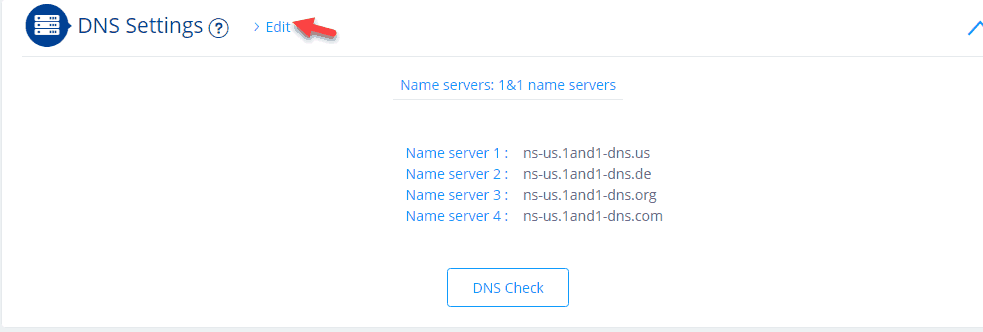
Change Domain Name Servers
Changing domain nameservers is one of two ways hosting your domains. Specifically, you change the names of 1 & 1 hostname servers or an intermediary name server such as CloudFlare.
On the Domain Settings page, click DNS Settings. You will now see the current Name server information. Click the Edit link.
The Edit DNS Settings screen appears:

At Name Server Settings, select Other name servers and enter the Nameserver. 1. On the Additional name servers list, select My secondary name servers. Next, enter Nameserver 2, 3, and 4 if desired. As shown above, I am entering CloudFlare’s nameservers.
Finally, click Save to save.
Note, it may take up to 48 hours for changes to take effect
Point the IP to the domain.
This is the second way you use when you want to point domain hosting. Remember that if you do this, you must use Nameserver 1 & 1. That is, in the Name Server Settings field of the Nameserver, you must check the option of 1 & 1 name servers.
Now we will change the IP value of the domain. At the A / AAA and CName Records below Name Server Settings, select Other IP address. Then enter the IPv4 address. If you want to use IPv6 then type in the box below.
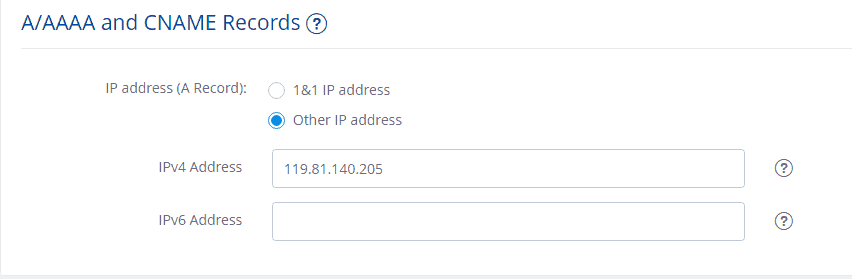
Finally hit the Save button to save.
Create a subdomain for the domain
Go back to the Domain settings page, click the Create Subdomain button in the Subdomain Overview section.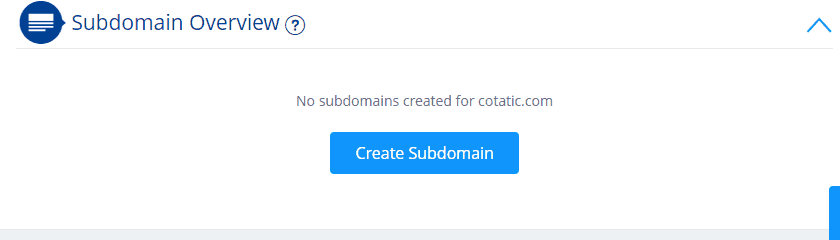
Enter the subdomain name and click the Create Subdomain button.
You will now see the subdomain you just created. Click Edit DNS Settings to configure the subdomain.
The DNS Settings screen appears. Pull down. At the A / AAA and CNAME Records, choose Other and enter the IP Address IP. Or select CNAME and enter Alias.
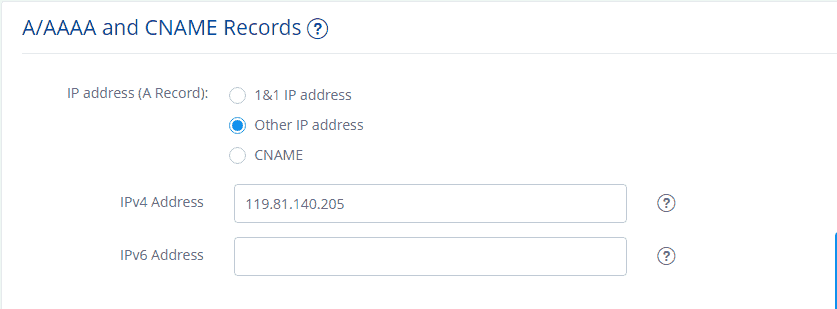
Finally, click the Save button.
Hopefully, with this article, you will easily manage your domain at 1 & 1. If you have any problems using the domain at 1 & 1, please leave a comment below.
