New domain name registration or renewal rates in Namesilo are relatively cheap, So many bodies began to trust gradually move domain here.
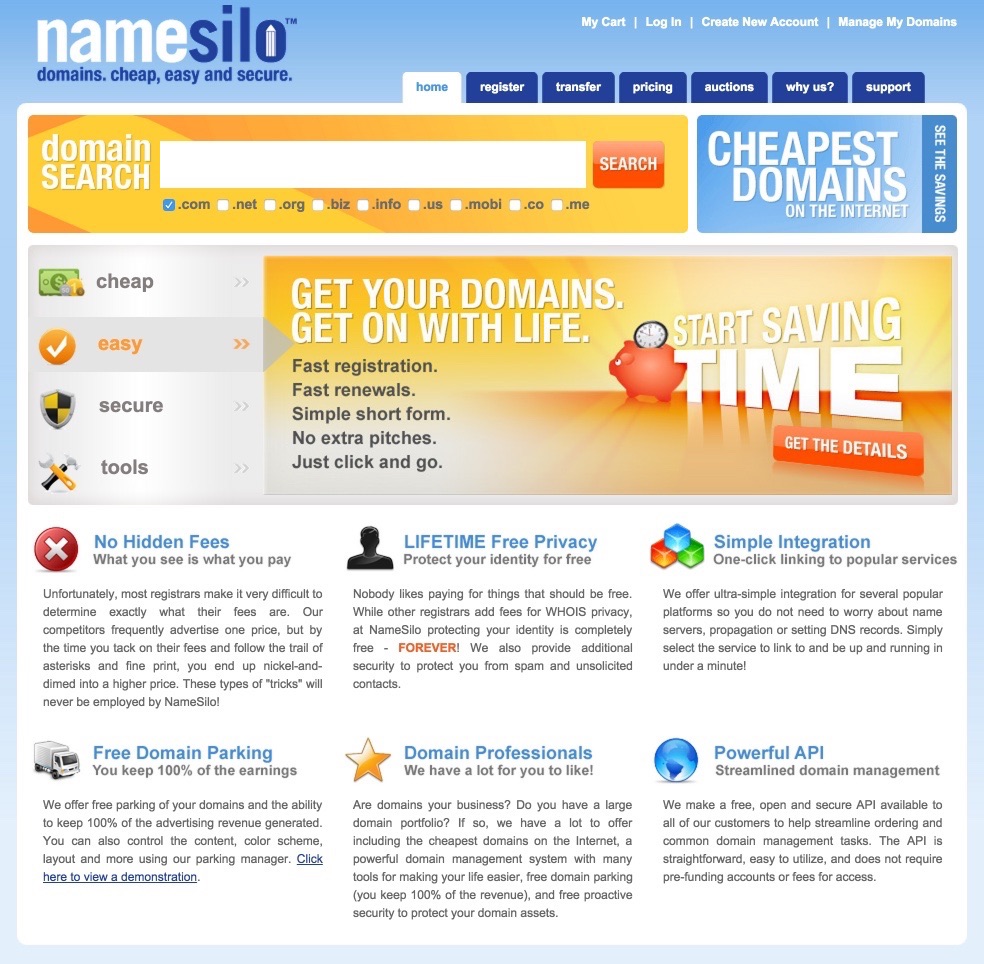
Easy to Manage domain names at NameSilo.com
First, visit the login page of Namesilo, the account management page will appear after you successfully log in.
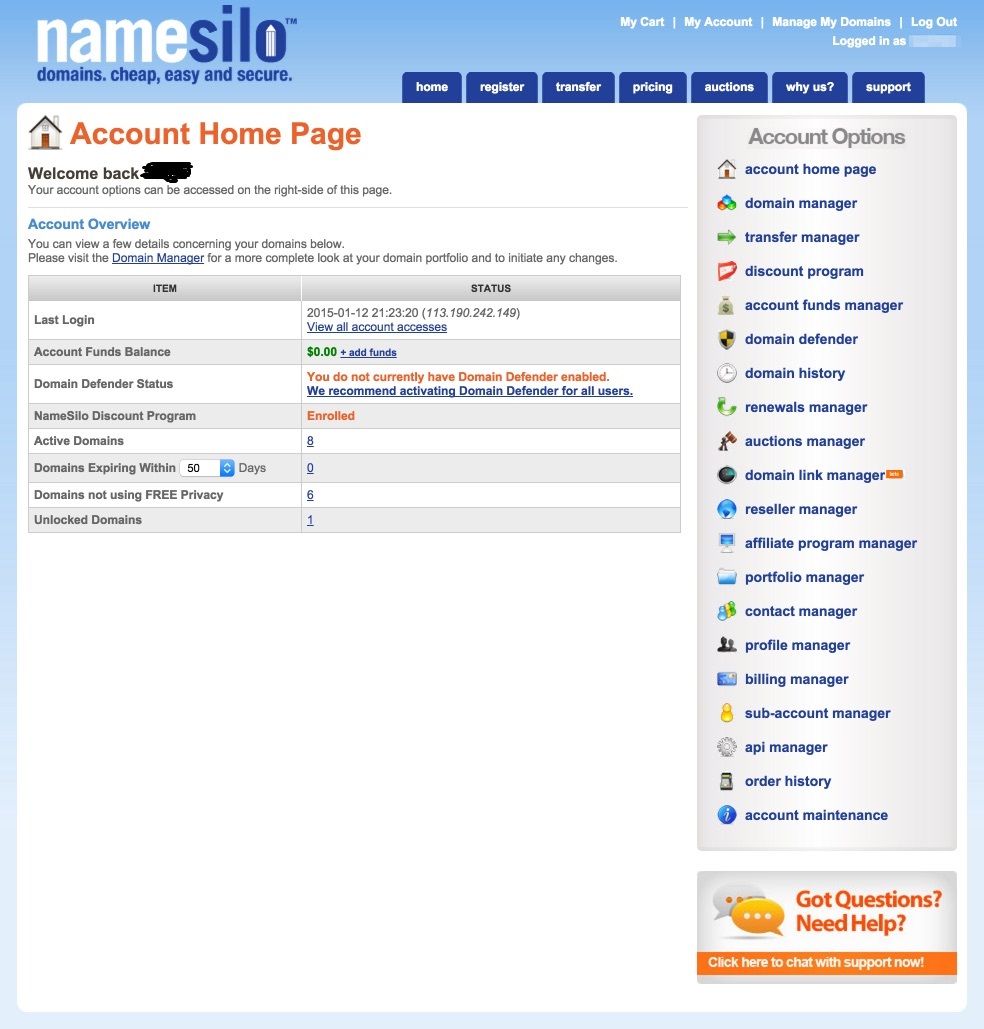
Next, click the domain manager link to go to the domain management page.
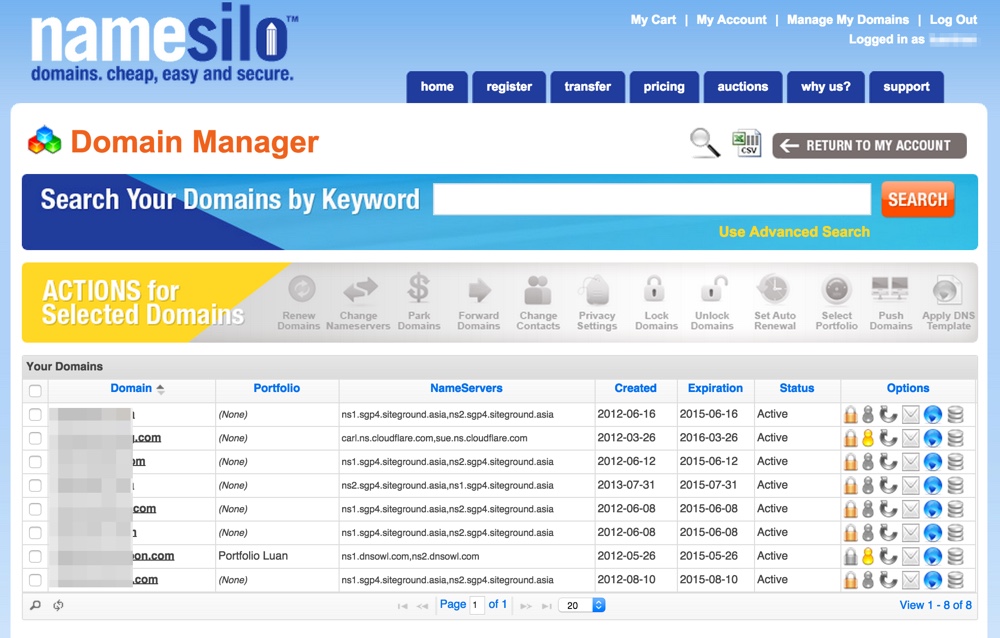
1. Change the nameserver
– Please click on the domain, in NameServers, click on the Change link.

– Enter the nameserver you want to use in the NameServer Entry, if you need to add a record then click the Add additional name servers link.
– In case you want to use Namesilo’s default nameserver, click on the following link. Namesilo will automatically fill in the 3 default nameservers: NS1.DNSOWL.COM, NS2.DNSOWL.COM, and NS3.DNSOWL.COM.
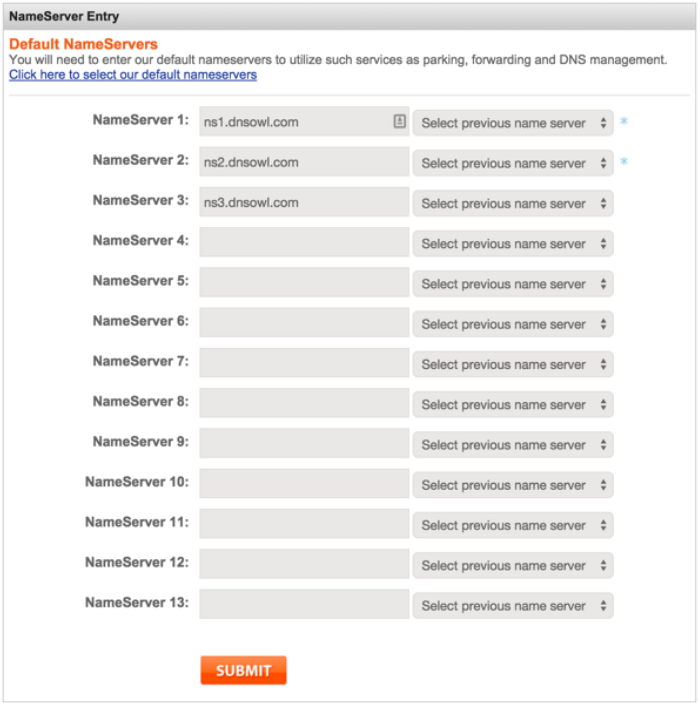
Finally, click SUBMIT to save the information.
2. Point the IP to the domain
This function only works if you use Namesilo’s default nameserver, see section 1. If you are using an external nameserver, go to the domain admin’s DNS page or switch to the Namesilo’s default nameserver.
– To change the IP for the domain, click on the domain and then click Update in the DNS Records.
– The current record will be displayed, you can directly edit or delete the record.
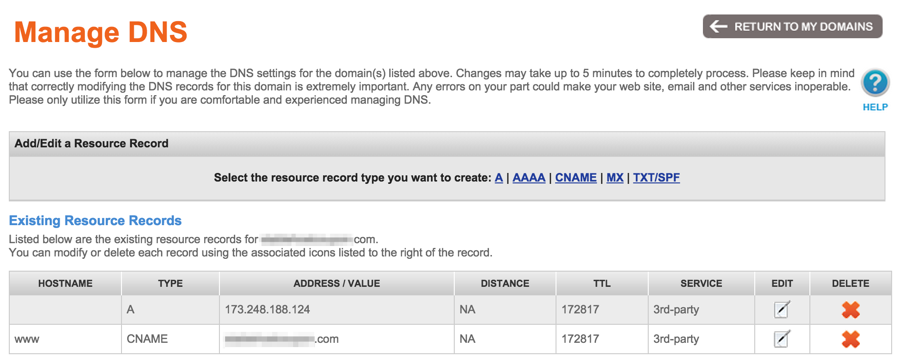
– Click the type of record you want to add in the Add / Edit a Resource Record section, which may be A, AAAA, CNAME, MX or TXT / SPF record.
Then you enter HOSTNAME and the corresponding record value and then click SUBMIT to save. HOSTNAME is empty corresponding to value @.
Namesilo has a number of DNS templates available for you to use, just click the Apply Template button and everything will be configured correctly. Some popular templates are available such as:
- Blogger – Blogspot
- Google Apps
- Zoho Mail
- Github
- Tumblr
3. Change domain information
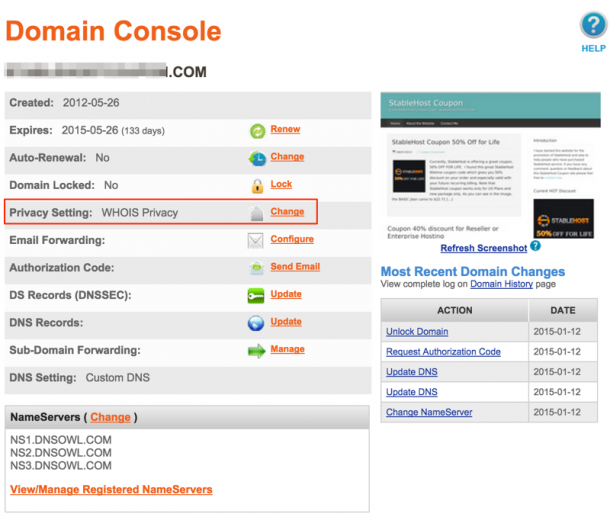
If you do not use the function to hide domain information in Namesilo and want to change the domain owner information, click on the domain and click Change in the Domain Contacts section.
Namesilo manages domain information in the form of Profile in Contact Manager. You can specify which domain each profile will use. And when you change the profile, the corresponding domain will also be changed info.
Create Profile with the necessary information, then select corresponding to the Update Domain Contacts page and click SUBMIT to save.
4. Set Whois Private information
While other providers charge for domain ownership ($ 9.9 per year for GoDaddy) or at least for the first year of FreeChat (Namecheap), Namesilo is free to use. You will only spend domain renewal here.
This is why more and more domains are transferred to Namesilo, avoid looking at other people.
To enable this function, click on the domain in the domain management page. In the Privacy Setting section click Change to change.
On the Manage Privacy Settings page, the Privacy Selection section selects WHOIS Privacy and then click SUBMIT to save.
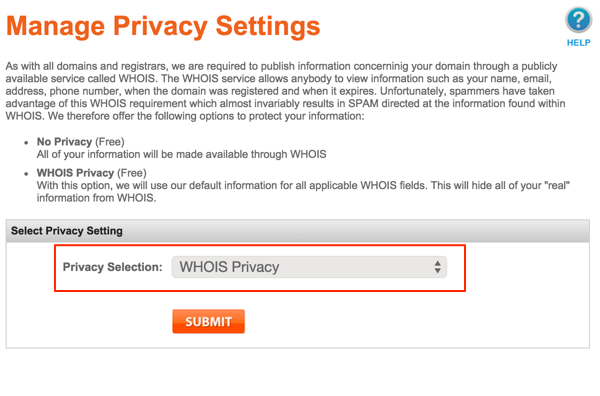
That’s it, No one can know your domain information.
5. Domain Renewal
Even if the domain is still a few years to expire, you still proceed to extend the domain by clicking on the domain in the management page, select the Renew link in the Expires and carry out payment.
6. Unlock and get the Authorization code
Once you have chosen Namesilo as your landing page, your ability to move domains is very low. However, I still guide this section for those who want to unlock the domain, get the code Auth code and transfer domain to another provider.
Unlock domain
The first thing when you want to move domain is Unlock domain. After you click on the domain you want in the domain management, in the domain Locked click Unlock.
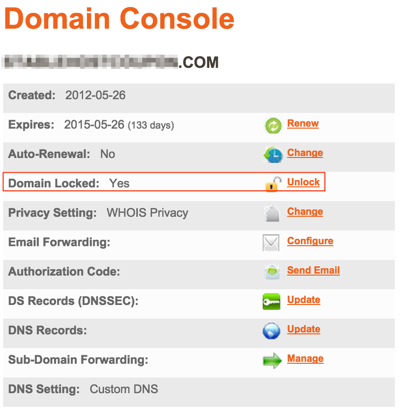
n the next page just click Submit is complete.
Get the Authorization code code
Similar to Unlock, getting code Auth Code in Namesilo is simple, not as hard as in other vendors.
In the domain management, click the Send Email in the Authorization Code line. Finally hit SUBMIT.
Immediately, Auth Code will be sent to your email address so that we can transfer the domain.
Transfer domain through another account
When domain transactions or simply want to give the domain to another account in Namesilo, then will need this domain push function.
After the successful push, you will have no rights to the domain anymore should be careful when doing. Domain also needs to unlock before pushing for others.
In the domain management page, tick the domain you want to push and press the Push Domain on the Action menu.
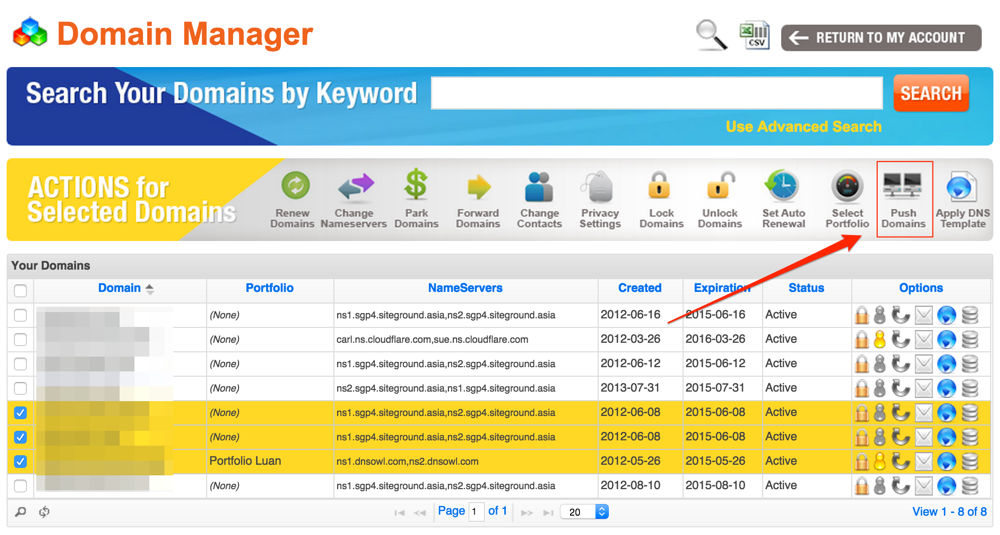
On the next page, enter your password and the username of the person who will receive the domain and click SUBMIT.
It is done.
8. Some other functions
Namesilo provides users with a lot of useful functions for easier domain management on the top of the account management page.
2-Factor Authentication
The two-layer security feature makes it easier than ever to protect your Namesilo account.
Once activated on the account maintenance page, you will need to enter a code from the phone every time you sign in.
According to me, this function is only available with smartphones with the app installed Google Authenticator or Authy.
Domain Defender
This is also a security enhancement function for Namesilo domains.
With Domain Defender, you will set security questions for the domain, only if the correct answer to these questions can do the editing, updating domain. Up to 5 questions.
If combined with 2-Factor Authentication, no one can do anything with your account or domain.
Portfolio manager
This feature helps you group domains and manage them more easily. This is useful when used with the subaccount functionality below.
Sub-Account Manager
When you push a domain through another account, you will have no rights to that domain. However, in case you are lent or leased to another person, the extra account creation function is what you will need.
You can create the unlimited number of accounts, set expiration date, grant permissions with Portfolio to manage the domain.
The portfolio must be created before creating additional accounts.
Domain History
All changes to both primary and secondary domains will be stored here for easier tracking.
Domain Link Manager
When you have multiple domains, managing them is very difficult.
Namesilo provides the Domain Link Manager tool so you can easily keep track of all current domains, whether they are in another provider or Namesilo.
This feature is still in beta, providing general information including date of domain creation, expiration date, date of update and nameserver.
Namesilo Discount Program
The new registration/ transfer/renewal domain in Namesilo is relatively cheap, but you can still get a lower price when you activate the Discount Program.
Specifically, when you pre-load an amount and pay using this amount, the domain price will be reduced a bit. A detailed price list can be found here.
