Hello, If you have a domain like yourname.com, you can create free custom domain email with Zoho like yourname@yourdomain.com.
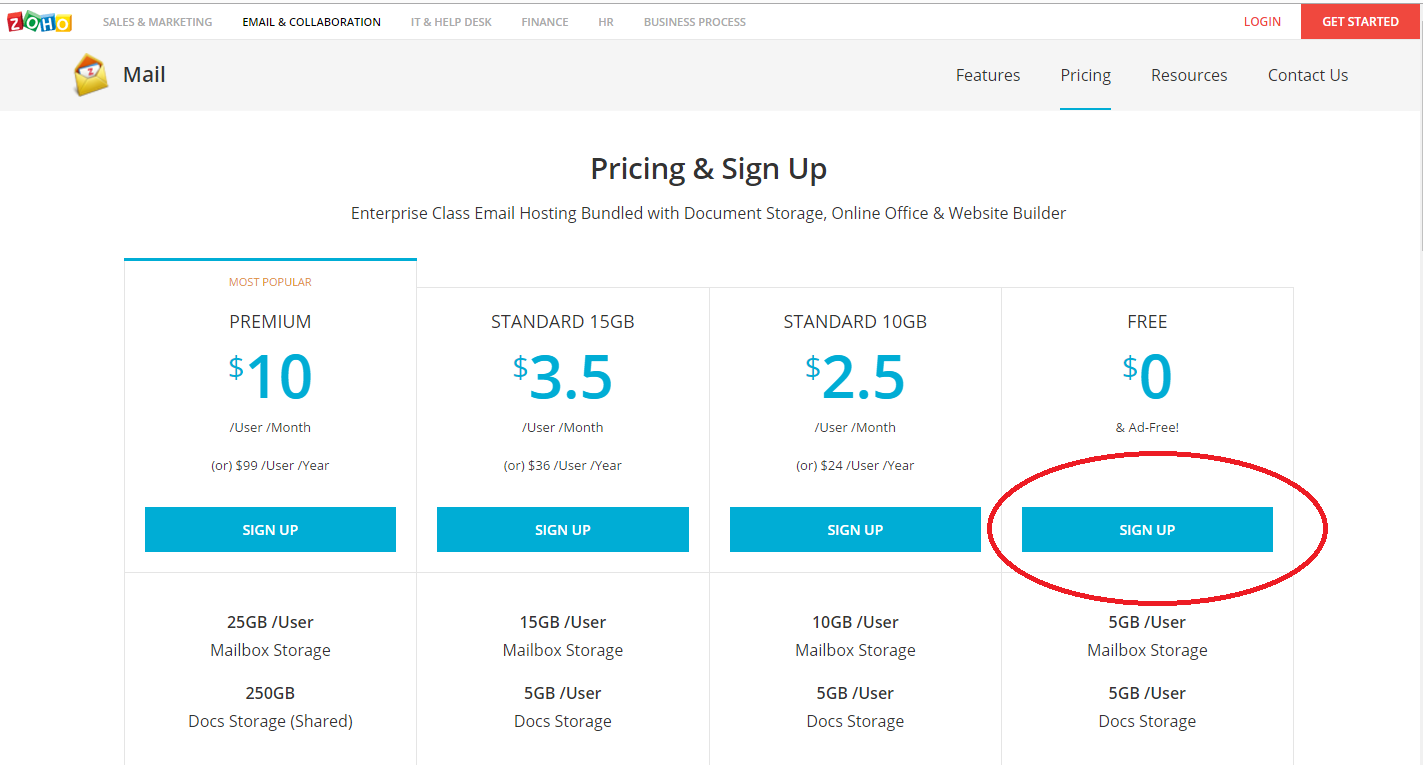
With a free account, you get 1 domain, 25 users, and 5 GB mailbox store. If you have a higher demand, you can upgrade to a paid account for more support. You will have Webmail and App on Mobile, SMTP or IMAP for all email software. You can read How to buy a domain name at GoDaddy to buy a new domain for Email.
 Setup Free Custom Email Domain with Zoho
Step 1: Register your Zoho account
First, visit the registration page here
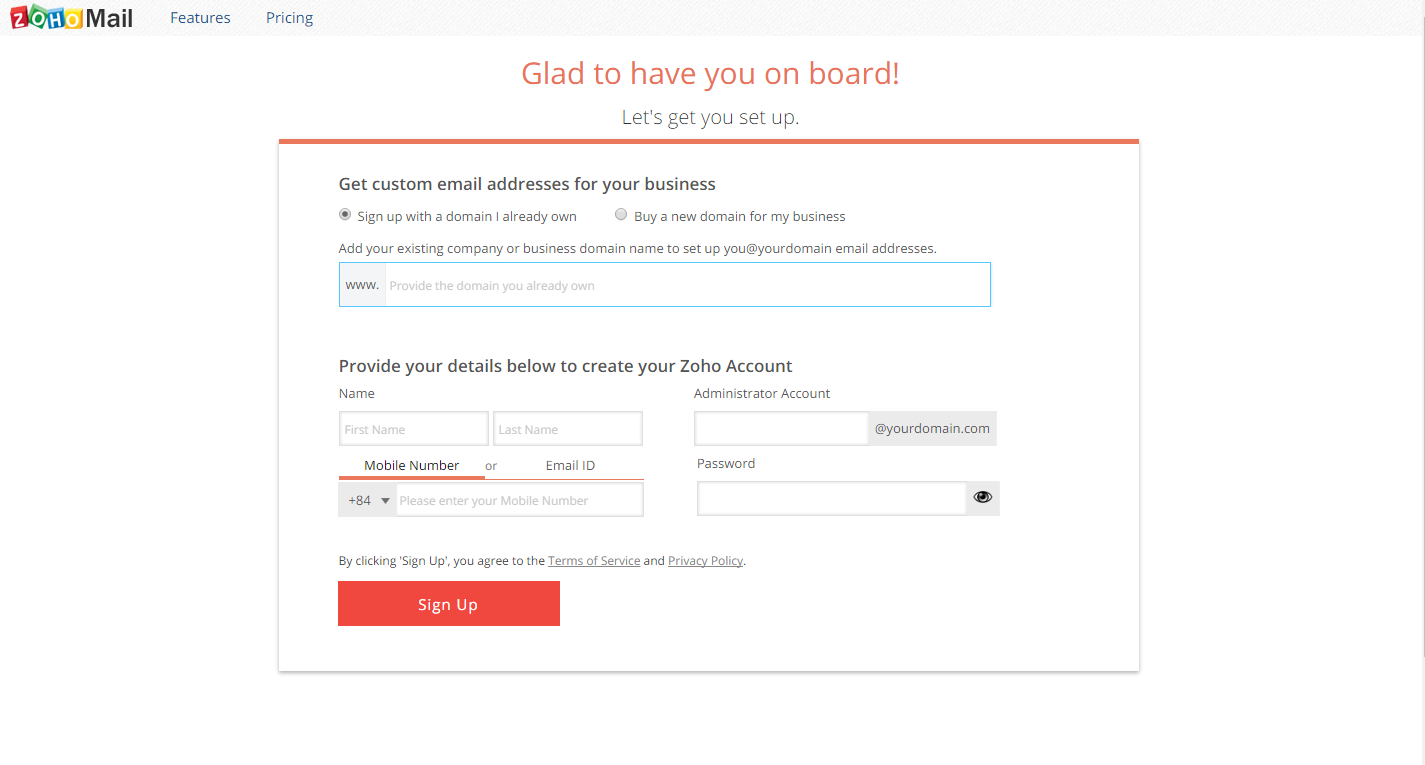
Press SIGN UP to start the registration
Complete the necessary information
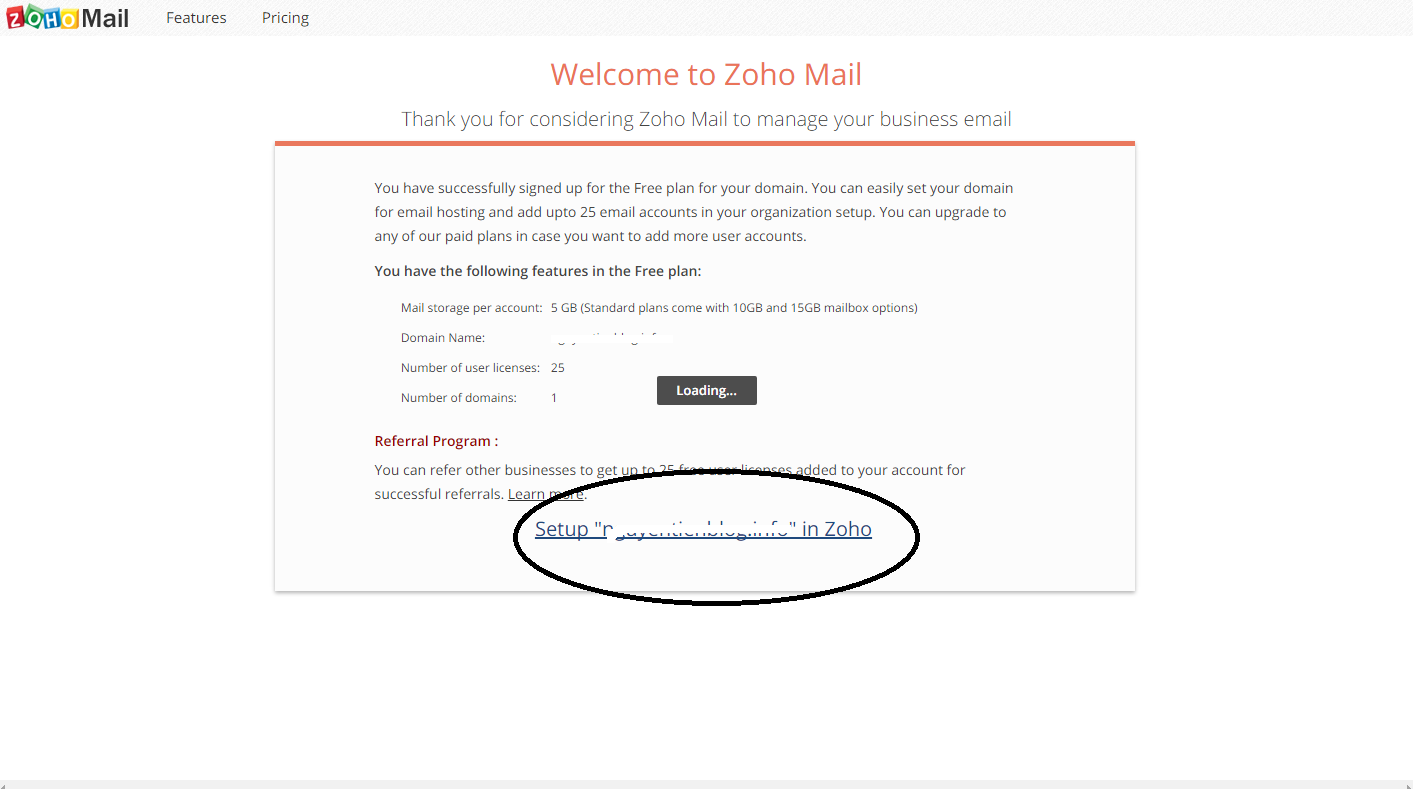
If the information you entered is correct, you will receive a welcome page. Click Setup “domain.com
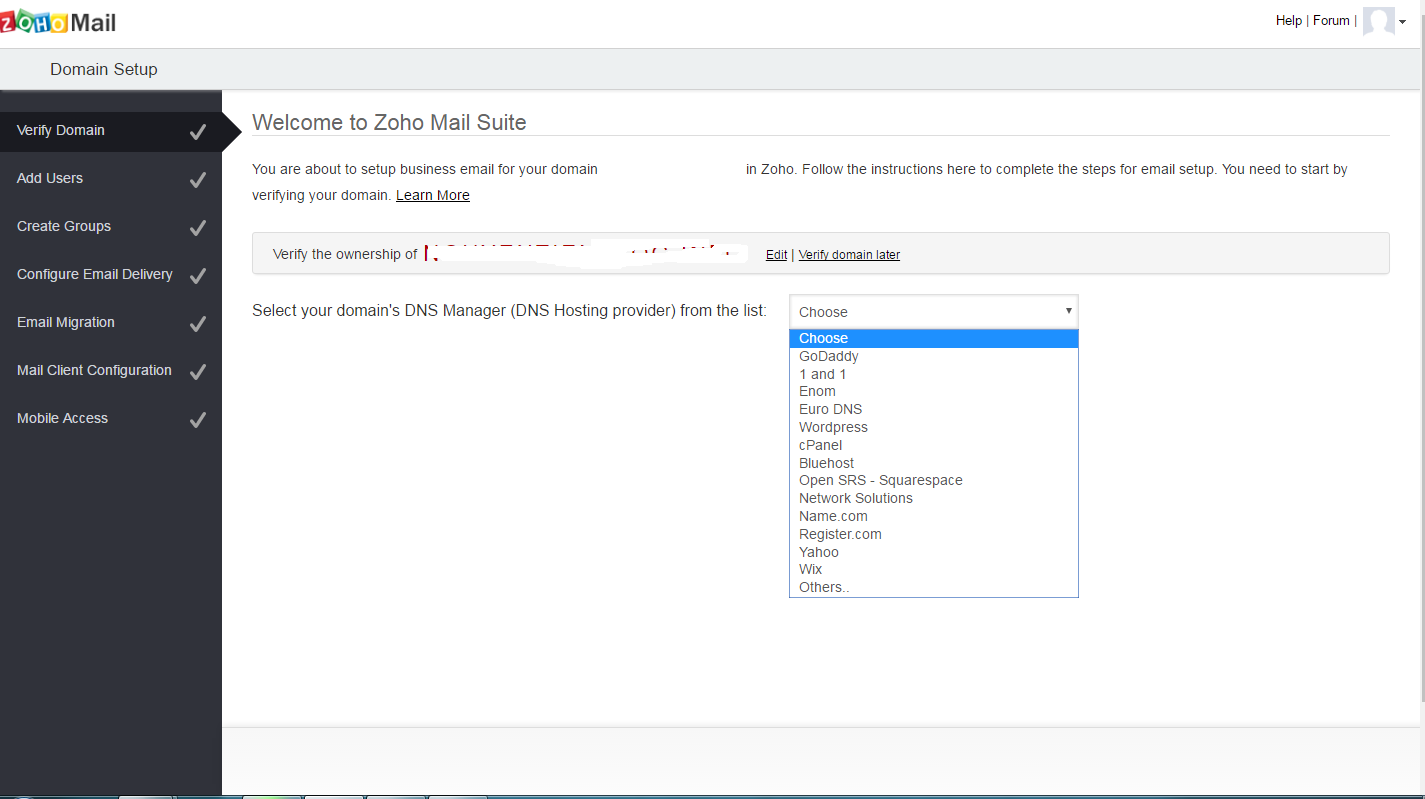
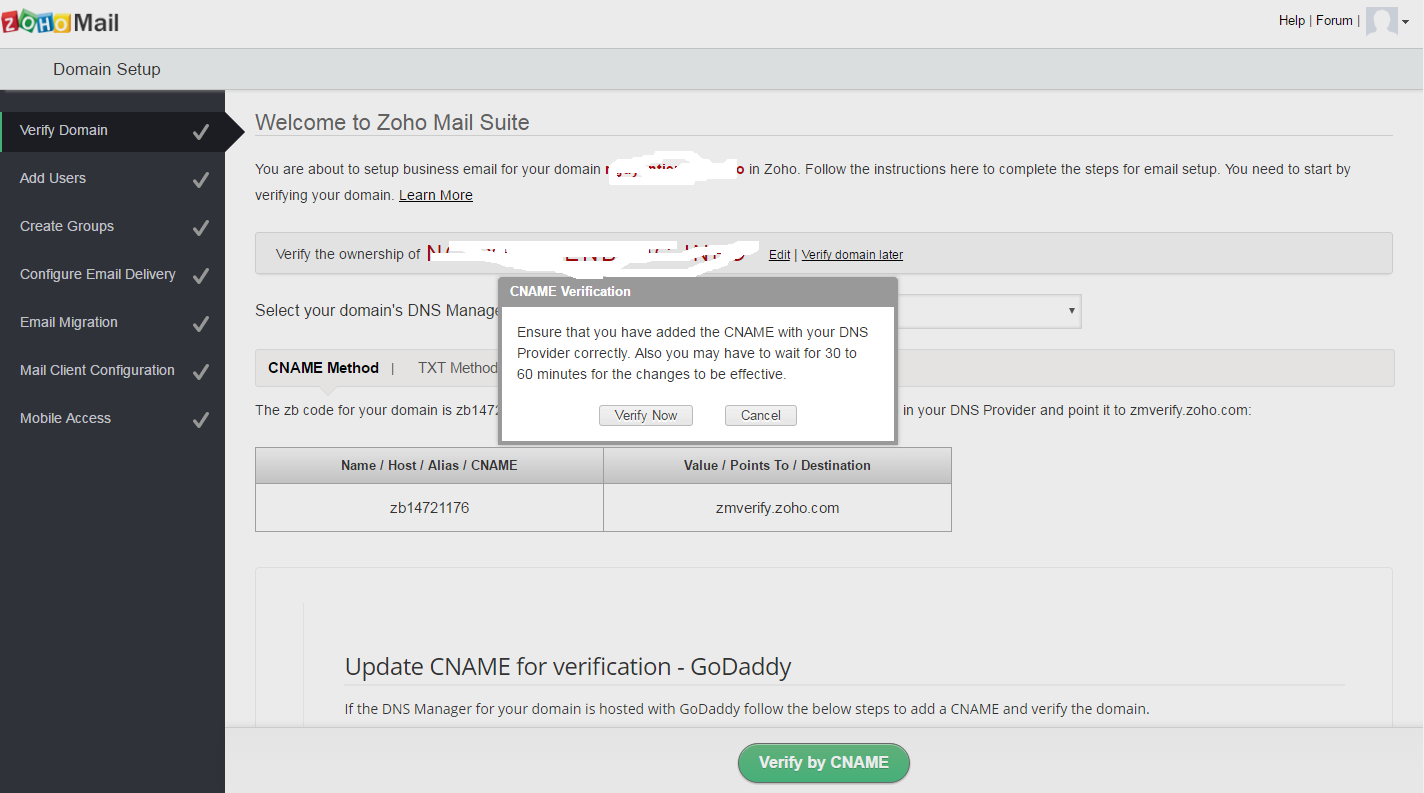
In this step, you will complete some of the actions that Zoho requires to verify that the domain you entered is your domain.

Select your domain name provider if it is on the supported Zoho list and follow the simple step by step instructions.
If your provider is not listed, select Others

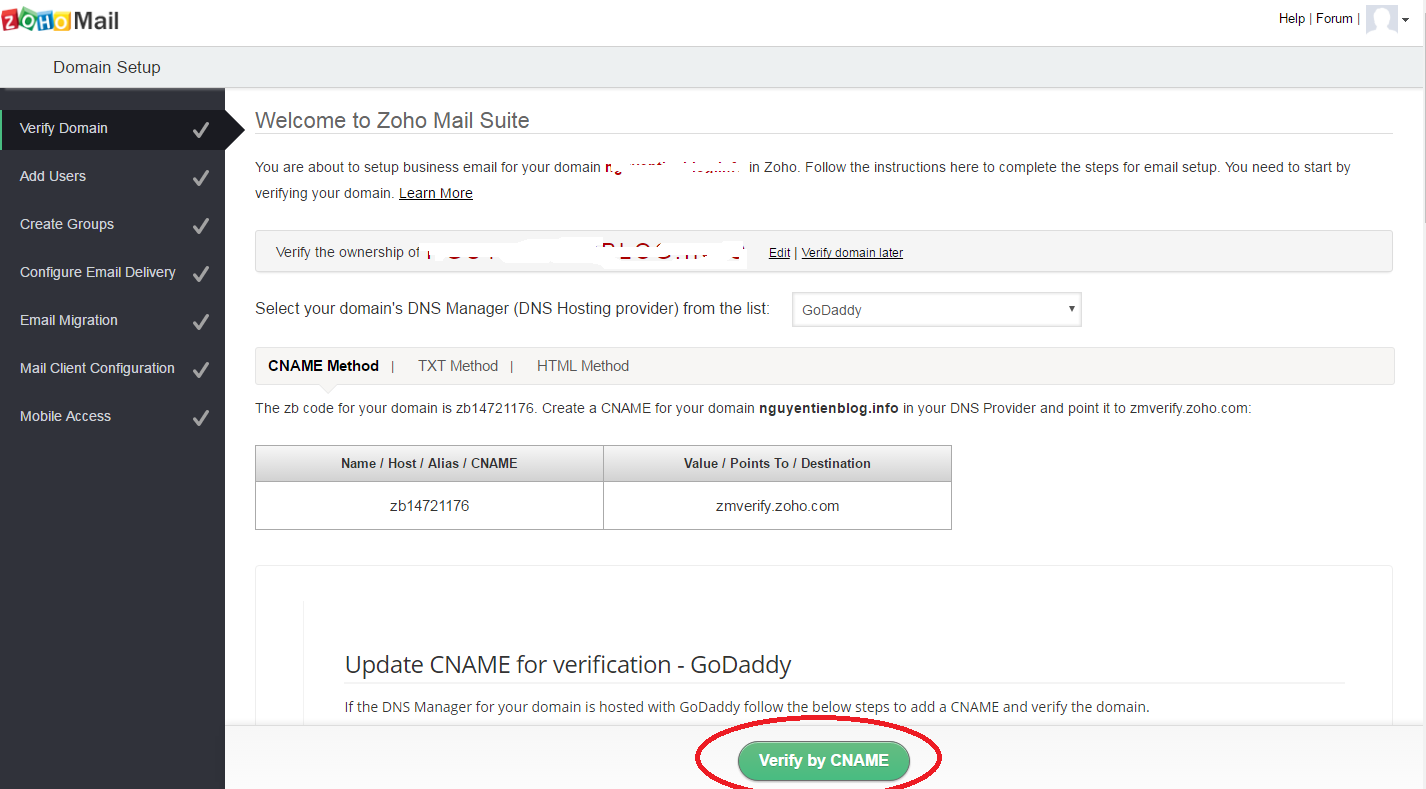
We will have 3 ways to confirm your domain name
- CNAME Method: CNAME validation
- TXT Method: Verify by TXT
- HTML Method: HTML validation
In this article, we will use the first, confirmed by CNAME. To proceed, log on to the domain’s DNS management page. Create a CNAME with content like Zoho required

Once completed, click Verify by CNAME to confirm your domain name
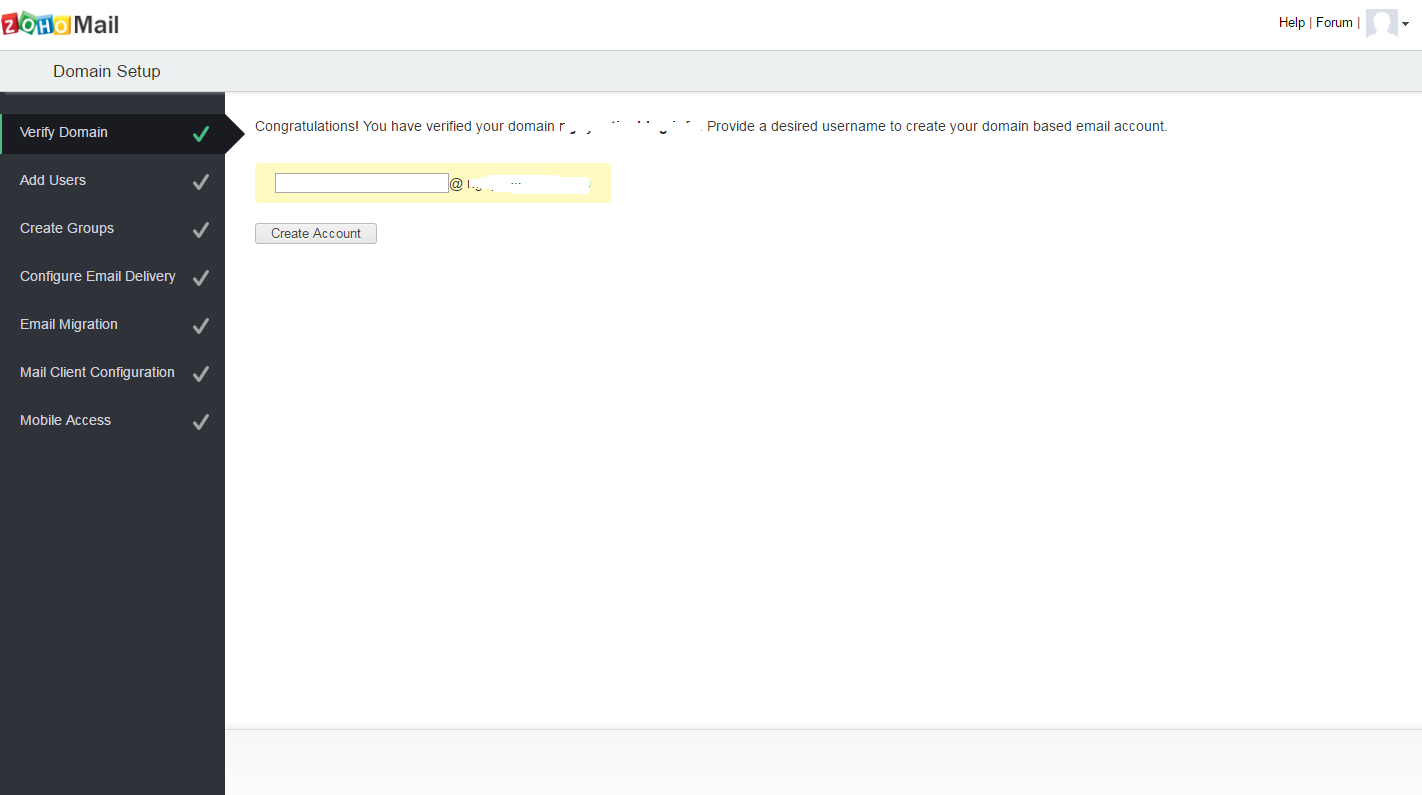
If successful, you will move on to the next step. Here, enter the name of the account you want to create. For example, yourname@yourdomain.com, and then click Create Account
On the next page, if you do not want to create more users, click Skip

You can also click Skip to ignore
In this step, we will configure DNS as required by Zoho to receive incoming email.
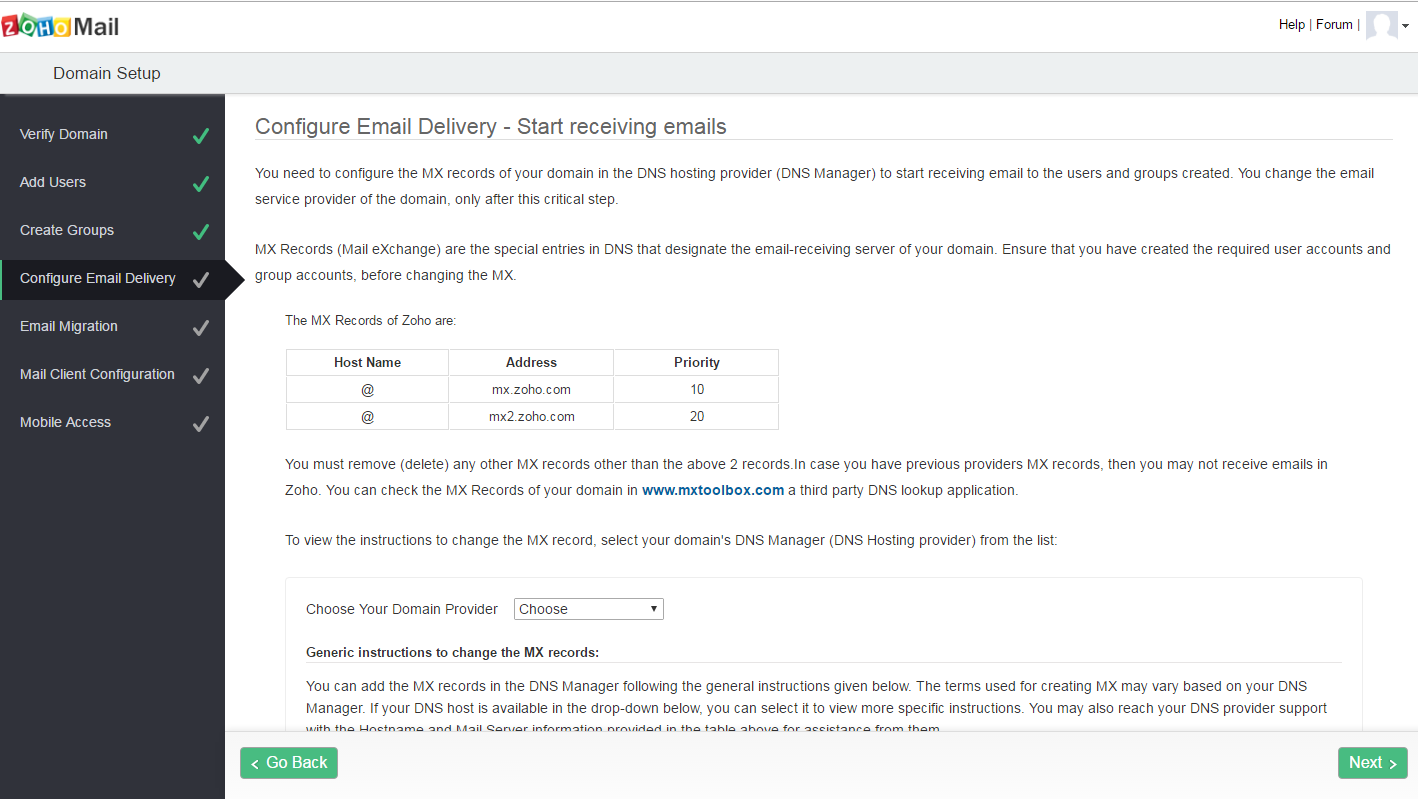
Return to the domain’s DNS management page, creating two more MX records with content like Zoho requests

When you create MX successfully at Domain Manage DNS, Go back to Zoho, click Next to continue
Now If you want to send email not to be moved to Spam, you need to configure additional SPF and DKIM for the domain
Configure SPF
In the DNS configuration page, add a TXT record with Name @and Value v=spf1 include:zcsend.net ~all
DKIM configuration
You create another TXT record, with Name is 3434._domainkey and Value is k=rsa; p=MIGfMA0GCSqGSIb3DQE
Wait for the domain name to update the entire record, click the Next button to go to the next step. You can skip some step if you don’t use.
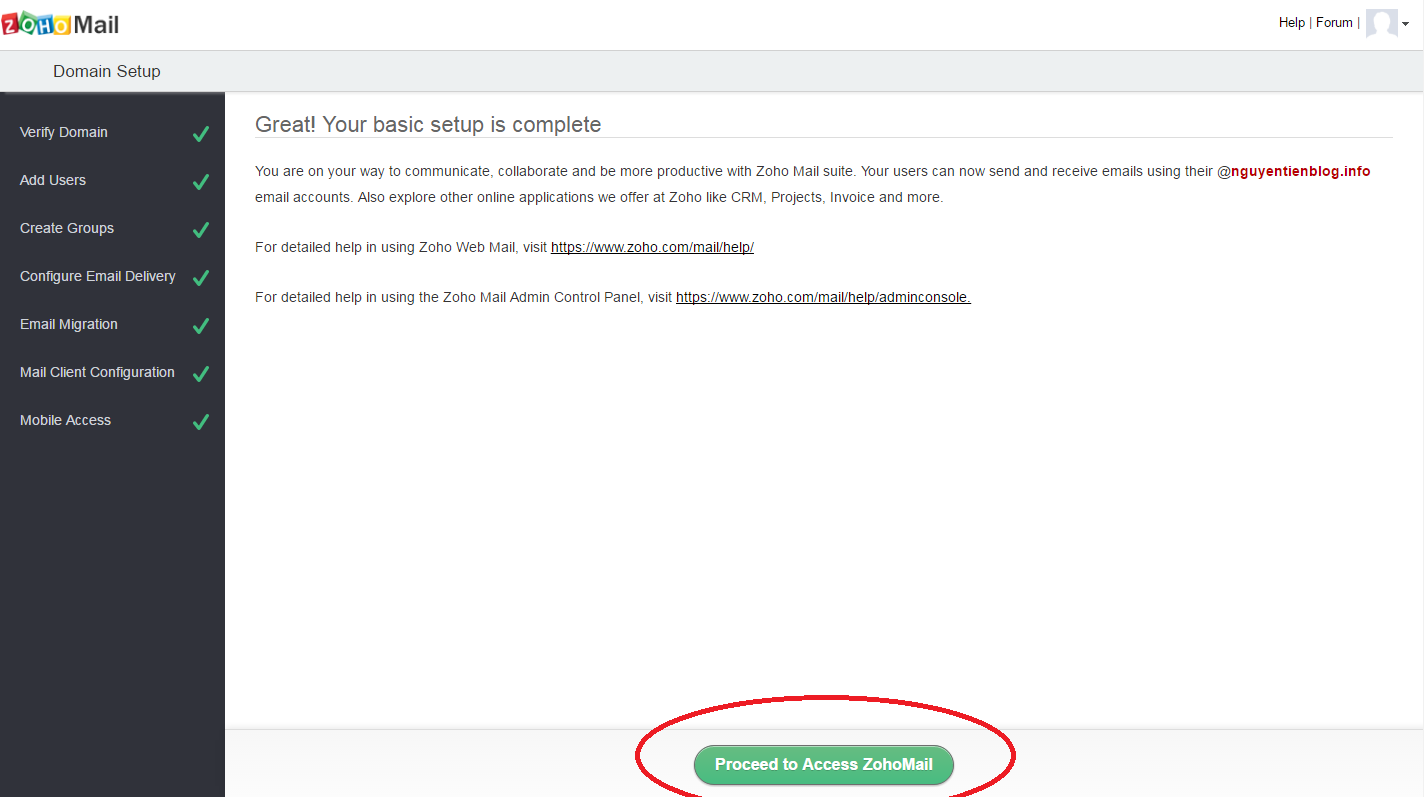
Here, congratulations, you have successfully created your domain name email with Zoho. Click Proceed to Access ZohoMail to go to the Email Management page