After buying a VPS, the first thing you need to do is connect to the VPS to install the applications. In this article, you will know how to use PuTTY software on Windows to log into VPS.
First, you need to download Putty from this link. After installing successfully, the software interface will look like below:

1. In the Host Name (or IP address) box, enter the IP server. Port to default 22 (port information varies from server to server)
2. Type connection to SSH and click Open.
3. A confirmation window appears, click Yes to continue
4. Next, enter your username and password root. When entering the password will not show any characters, so you enter carefully. Wrong passwords will be required.
5. If the login is successful, a Welcome message will appear.
Putty can log in to VPS when using Private Key. You will use it when you use Amazon EC2, Vultrs… How to create connections with Private Key?
For servers using the Private key authentication method. After entering the HostName (or IP Address) information
, select Connection => SSH => Auth under the Category . Then select the Private key file .
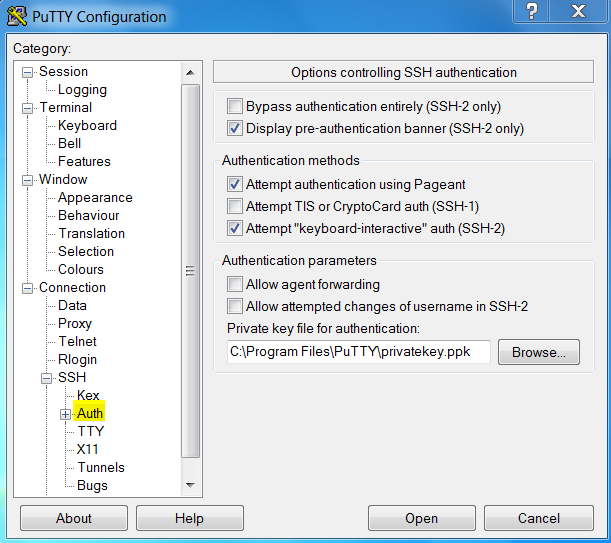
Then select Open to create the connection.
PuTTY is the simplest tool to help you manage your VPS so there is not much functionality. You can use Bitvise SSH Client, it has sFTP File Manager, you can upload, download the file like Filezilla FTP.
The SSH Client is robust, easy to install, easy to use, and supports all features supported by PuTTY, as well as the following:
- graphical SFTP file transfer;
- single-click Remote Desktop tunneling;
- auto-reconnecting capability;
- dynamic port forwarding through an integrated proxy;
- an FTP-to-SFTP protocol bridge.
Bitvise SSH Client is free to use. You can download it here.
