This tutorial will show you how to set up an FTP server on Ubuntu VPS. Vsftpd server is the most widely recognized, fastest and safest way to use FTP for Ubuntu VPS Server. If you don’t want to install FTP, you can use sFTP for downloading or uploading the file. You can use Filezilla or Tunnerlier.
This tutorial is for Ubuntu 16.04. But you can apply the same way to create an FTP server on Ubuntu 14.04
Install Vsftpd
First, update the product package before proceeding to install the vsftpd daemon. To begin, run the following command:
sudo apt-get update
Wait for the process to finish, then you will get the following message:.
![]()
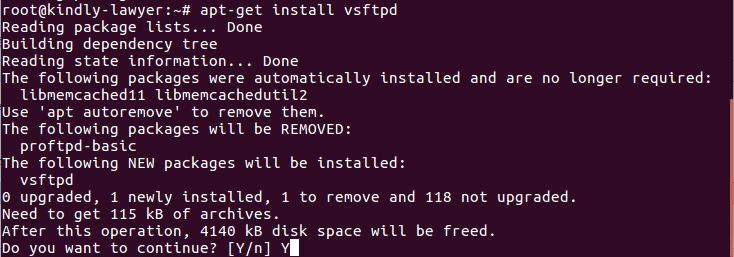
Then execute the following command to install vsftpd daemon:
sudo apt-get install vsftpd
You will be asked to confirm, press Y to agree and then press Enter to start
After the installation is complete, back up the original file so that we can start with a blank configuration file:
sudo cp /etc/vsftpd.conf /etc/vsftpd.conf.originalNow we are ready for the next step to configure the firewall.
Enable FTP traffic through the firewall
To allow the Ubuntu FTP server to communicate out, you need to allow it to be blocked by the firewall. See if the firewall is enabled by using the following command:
sudo ufw status
If you see this message:
ufw: can not find the commandThis means that the firewall is not enabled and you can continue to the next step.
However, if the results show otherwise, with some rules already defined or a message saying that the fire is active, you will have to determine whether the FTP connection is working. Please continue and open port 20 and 21 for FTP connection; Port 40000-50000 has been reserved for some passive ports that may be configured in the configuration file and port 990 will be used when TLS is enabled. To do this, execute the following command:
sudo ufw allow 20 / tcp
sudo ufw allow 21 / tcp
sudo ufw allow 990 / tcp
sudo ufw allow 40000: 50000 / tcp
sudo ufw status
Output
Status: active
To Action From
- ------ ----
990 / tcp ALLOW Anywhere
20 / tcp ALLOW Anywhere
21 / tcp ALLOW Anywhere
40000: 50000 / tcp ALLOW Anywhere
20 / tcp (v6) ALLOW Anywhere (v6)
21 / tcp (v6) ALLOW Anywhere (v6)
990 / tcp (v6) ALLOW Anywhere (v6)
40000: 50000 / tcp (v6) ALLOW Anywhere (v6)
Now that you have all the ports open, you can continue to the next step.
Create the user directory
At this step 3 of the Ubuntu FTP server installation process, we will need you to select the user for FTP access. To do so, we will create a new user. To create a new user, execute the following command:
sudo adduser alex
sudo mkdir /home/alex/ftp
Select ownership using the following command:
sudo chown nobody: nogroup / home / alex / ftp
Finally, write permissions for that folder:
sudo chmod a - w / home / alex / ftp
Now use the following command to confirm the delegation:
sudo ls -la / home / alex / ftp
The results will look like this:
total 8
dr-xr-xr-x 2 nobody nogroup 4096 Jun 29 11:32.
drwxr-xr-x 3 alex alex 4096 Jun 29 11:32 ..
In the next step, we will create the file containing the directory and assign ownership:
sudo mkdir / home / alex / ftp / files
sudo chown alex: alex / home / alex / ftp / files
Finally, add a test file to this folder to test the result:
echo "vsftpd sample file" | sudo tee /home/alex/ftp/files/sample.txt
Configure vsftpd
The next step is to set up FTP server on Ubuntu VPS, we will configure vsftpd and FTP connection. In this tutorial, we will allow a single user to connect to FTP using a local shell account. The 2 points needed to configure are already set in the configuration file ( vsftpd.conf ). First, confirm the configuration file has the same settings as we mentioned above, using the nano command :
sudo nano /etc/vsftpd.conf
. . .
# Allow anonymous FTP? (Disabled by default).
anonymous_enable = NO
#
# Uncomment this to allow local users to log in.
local_enable = YES
. . .
In the same file, we will remove # and enable write_enable :
. . .
write_enable = YES
. . ..
Chroot will also be unmarked to ensure that users connected via FTP only have access to the allow directory:
. . .
 chroot_local_user = YES
 . . .
Some new values will be added manually. You can easily paste at the end of the file. First user_sub_tokenwill need to be added to the local_root directory path. This will allow the configuration file to work with the current user and other users if added later:
user_sub_token = $ USER
local_root = / home / $ USER / ftp
To ensure sufficient number of connections, we will limit the number of ports used in the configuration file as follows:
pasv_min_port=40000
pasv_max_port=50000
userlist_enable=YES
userlist_file=/etc/vsftpd.userlist
userlist_deny=NO
Finally, we will create and add users to the file:
echo "alex" | sudo tee -a /etc/vsftpd.userlist
cat /etc/vsftpd.userlist
![]()
Restart the daemon with the following command to upload changes:
sudo systemctl restart vsftpd
Secure FTP
By default, FTP will not perform data encryption, so we will set up TTL / SSL for secure data transfer. The first step, we will need to create SSL certificate and use it for Ubuntu FTP server. To create the certificate execute the following command:
sudo openssl req -x509 -nodes -days 365 -newkey rsa: 2048 -keyout /etc/ssl/private/vsftpd.pem -out /etc/ssl/private/vsftpd.pemFlag days make the certificate valid for one year with a private RSA key of 2048-bit in the same command. When completed, fill in the appropriate personal information in the fields that appear.
After you finish creating the certificate, reopen the configuration file again:
sudo nano /etc/vsftpd.conf
At the end of the file will be two lines starting with ” _rsa “. Place a note like this:
# rsa_cert_file = / etc / ssl / certs / ssl-cert-snakeoil.pem
# rsa_private_key_file = / etc / ssl / private / ssl-cert-snakeoil.key
Instead, we will point the configuration file to the certificate we just created, adding the following lines:
rsa_cert_file = / etc / ssl / private / vsftpd.pem
rsa_private_key_file = / etc / ssl / private / vsftpd.pem
We will now enable SSL and ensure that only SSL clients can contact us. Change the ssl_enable value to YES :
ssl_enable = YES
Now add the following lines for security reasons: (do not allow anonymous connections over SSL)
allow_anon_ssl = NO
force_local_data_ssl = YES
force_local_logins_ssl = YES
Configuring the server using TLS:
ssl_tlsv1 = YES
ssl_sslv2 = NO
ssl_sslv3 = NO
Here we will add two options. First, reusing SSL is unnecessary as it leads to an FTP connection failure due to too many connections from the FTP clients. Secondly, we will increase the security of encryption cipher suits, which will result in keys up to 128 bits long.
require_ssl_reuse = NO
ssl_ciphers = HIGH
Please reboot to apply the new changes:
sudo systemctl restart vsftpd
Very good! You have now successfully configured FTP on Ubuntu VPS to work with SSL / TLS authentication.
Finally, you can connect to your Ubuntu Server with Filezilla FTP client. If you don’t know to use. You can learn on this post.
